See how receipt expense tracking works
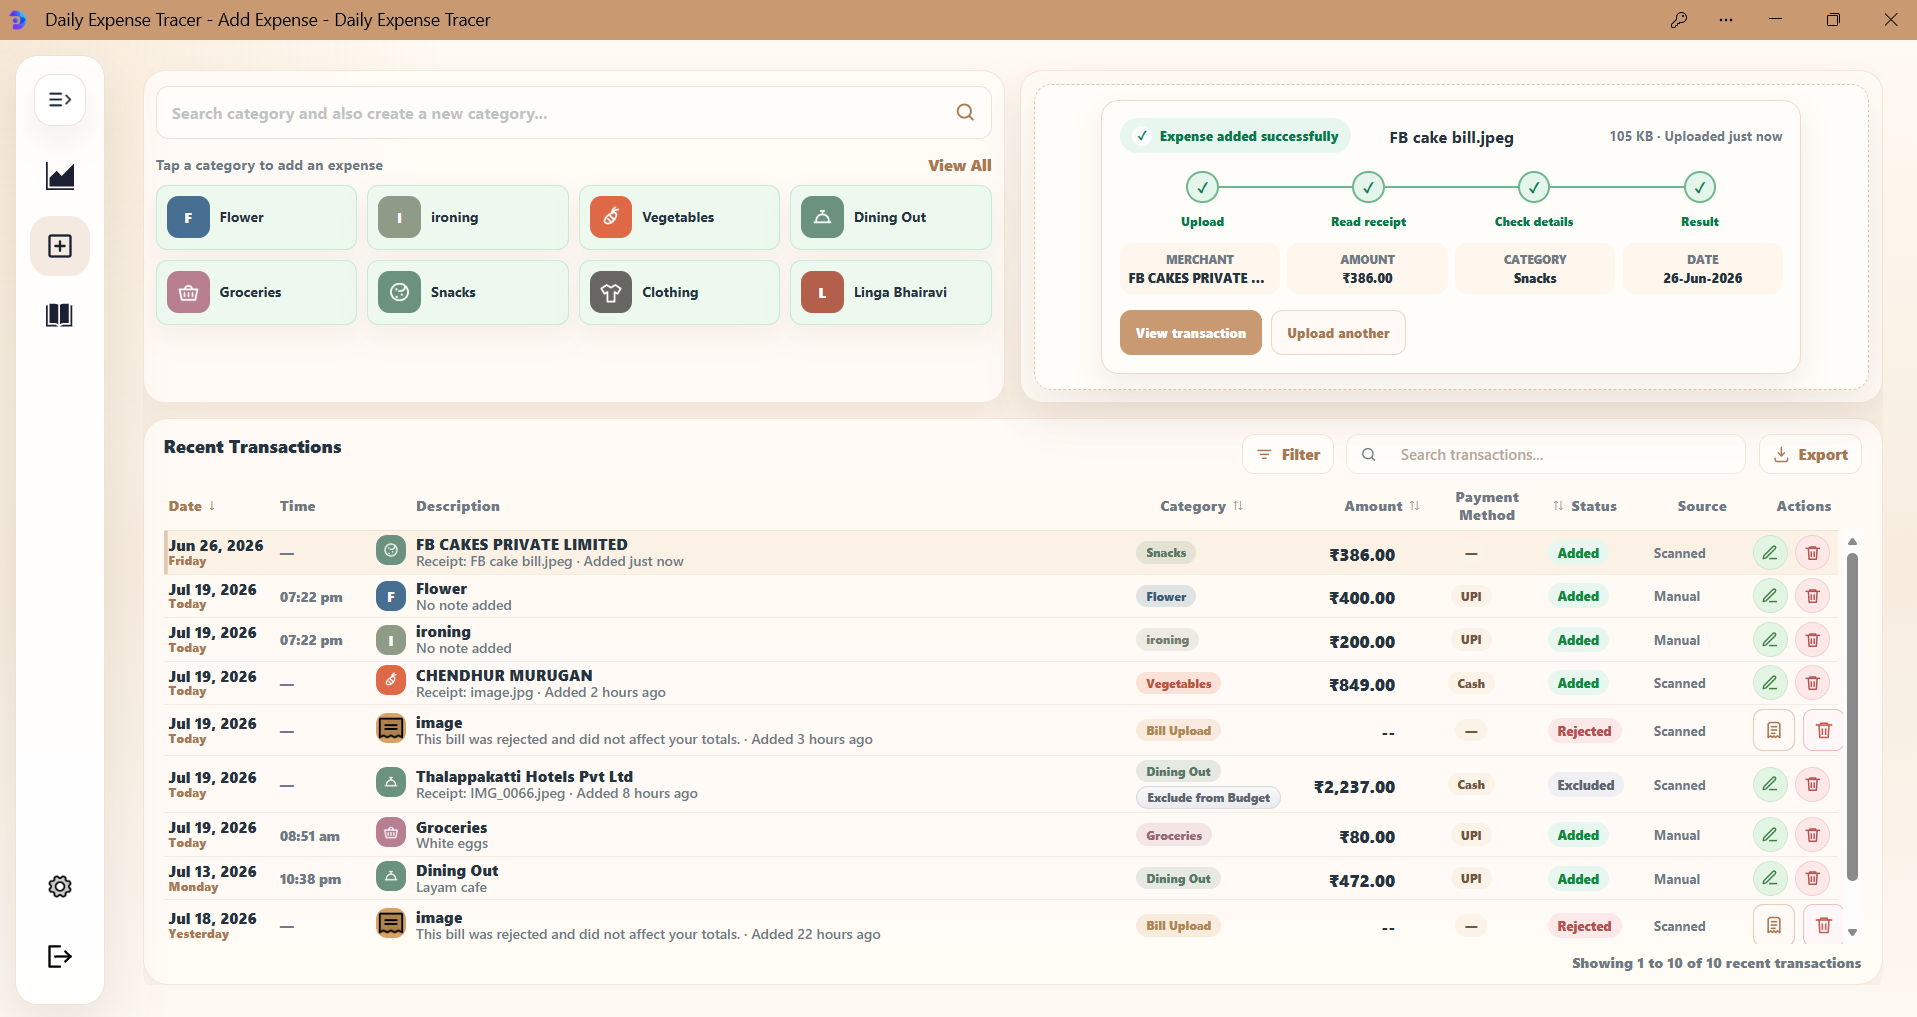

- CapturePhoto, upload or share
- ReviewOnly when something is missing
- TrackDashboard and budget update
Opening Daily Expense Tracer...
Checking your secure session
EXPENSE TRACKING, WITHOUT THE TYPING
Upload a bill, scan a receipt, or share a supported UPI payment screenshot. Daily Expense Tracer extracts the details and helps organize your day-to-day spending after a quick review.
ONE EXPENSE. ONE COMPLETE JOURNEY.
Instead of presenting disconnected feature cards, this section follows one real expense through DET—from capture to dashboard, budget, and reports.
Take a photo, upload a bill, drag and drop, or share a supported UPI receipt.
RECEIPT CAPTURE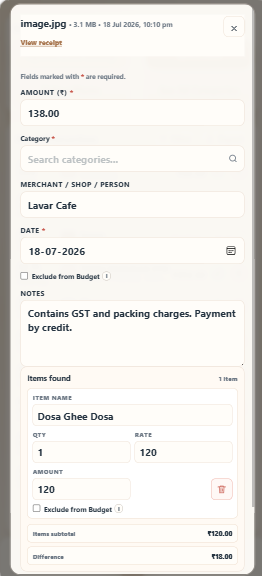
DET keeps the receipt visible and guides the user to missing or uncertain fields.
GUIDED REVIEWThe new record immediately contributes to monthly spending, categories, transactions, and insights.
SPENDING OVERVIEW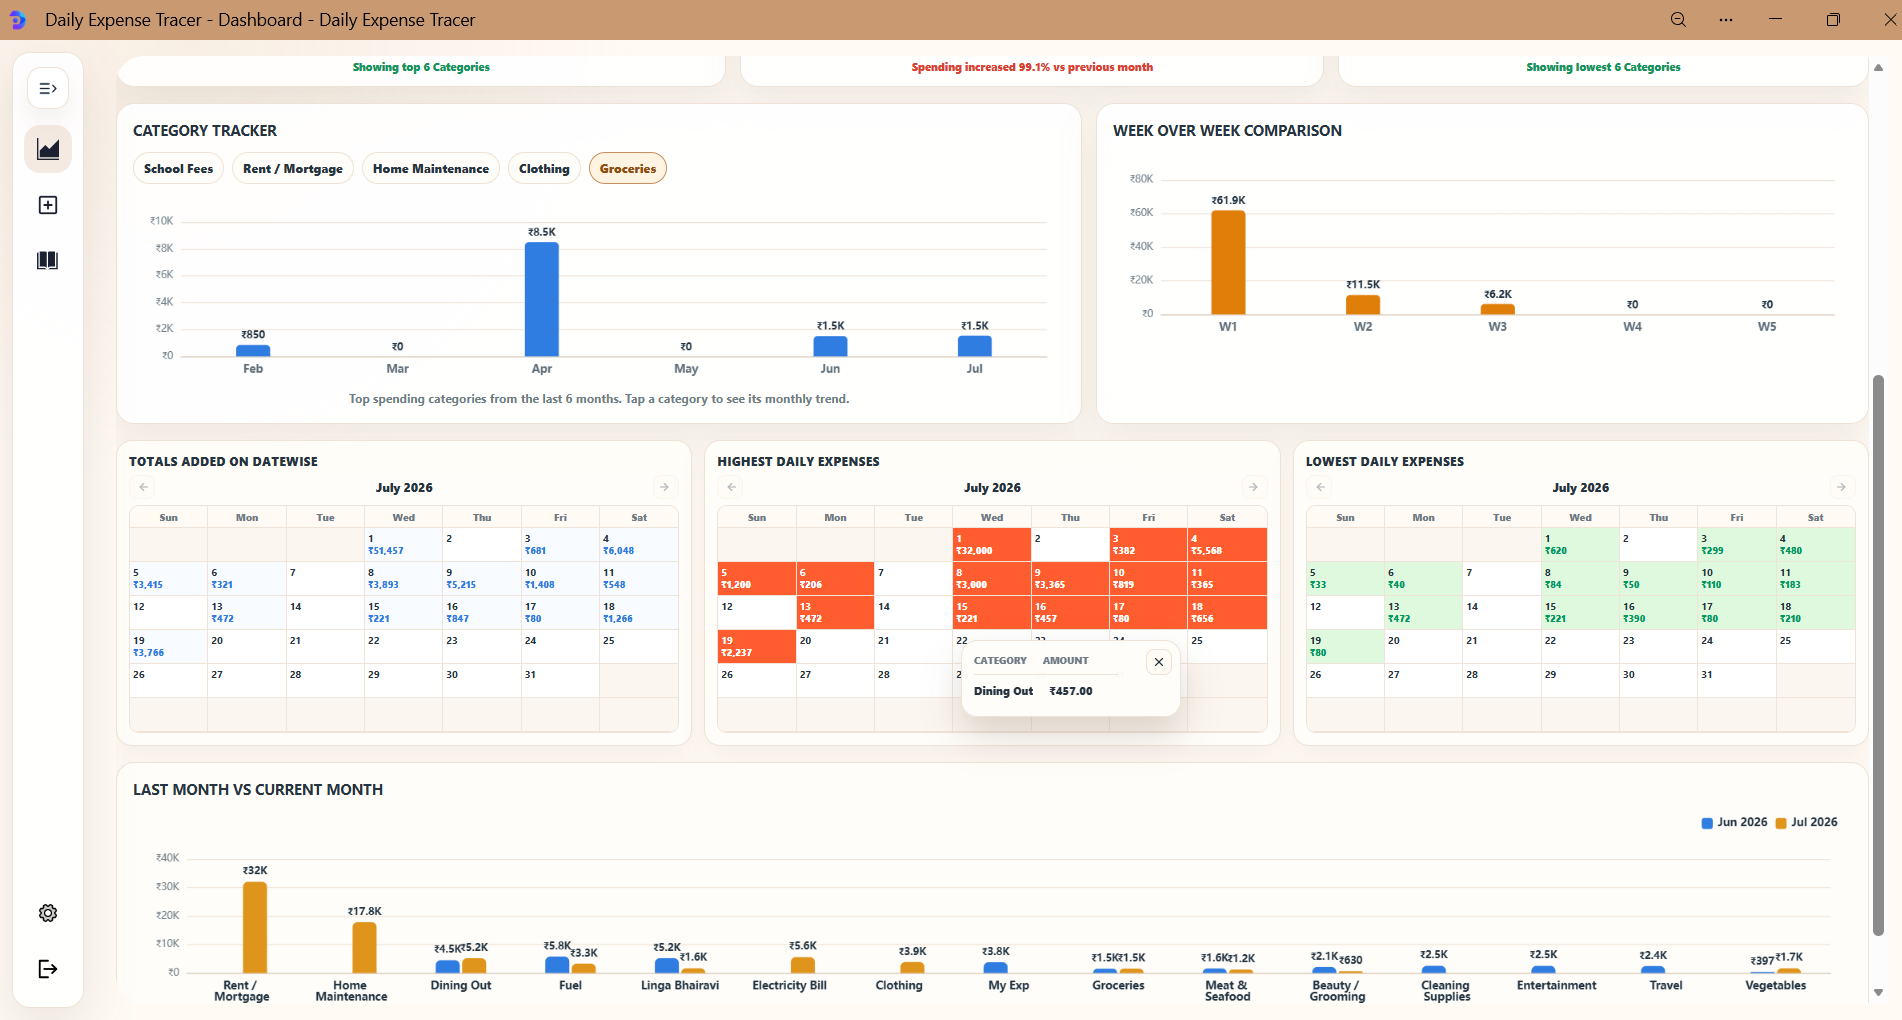
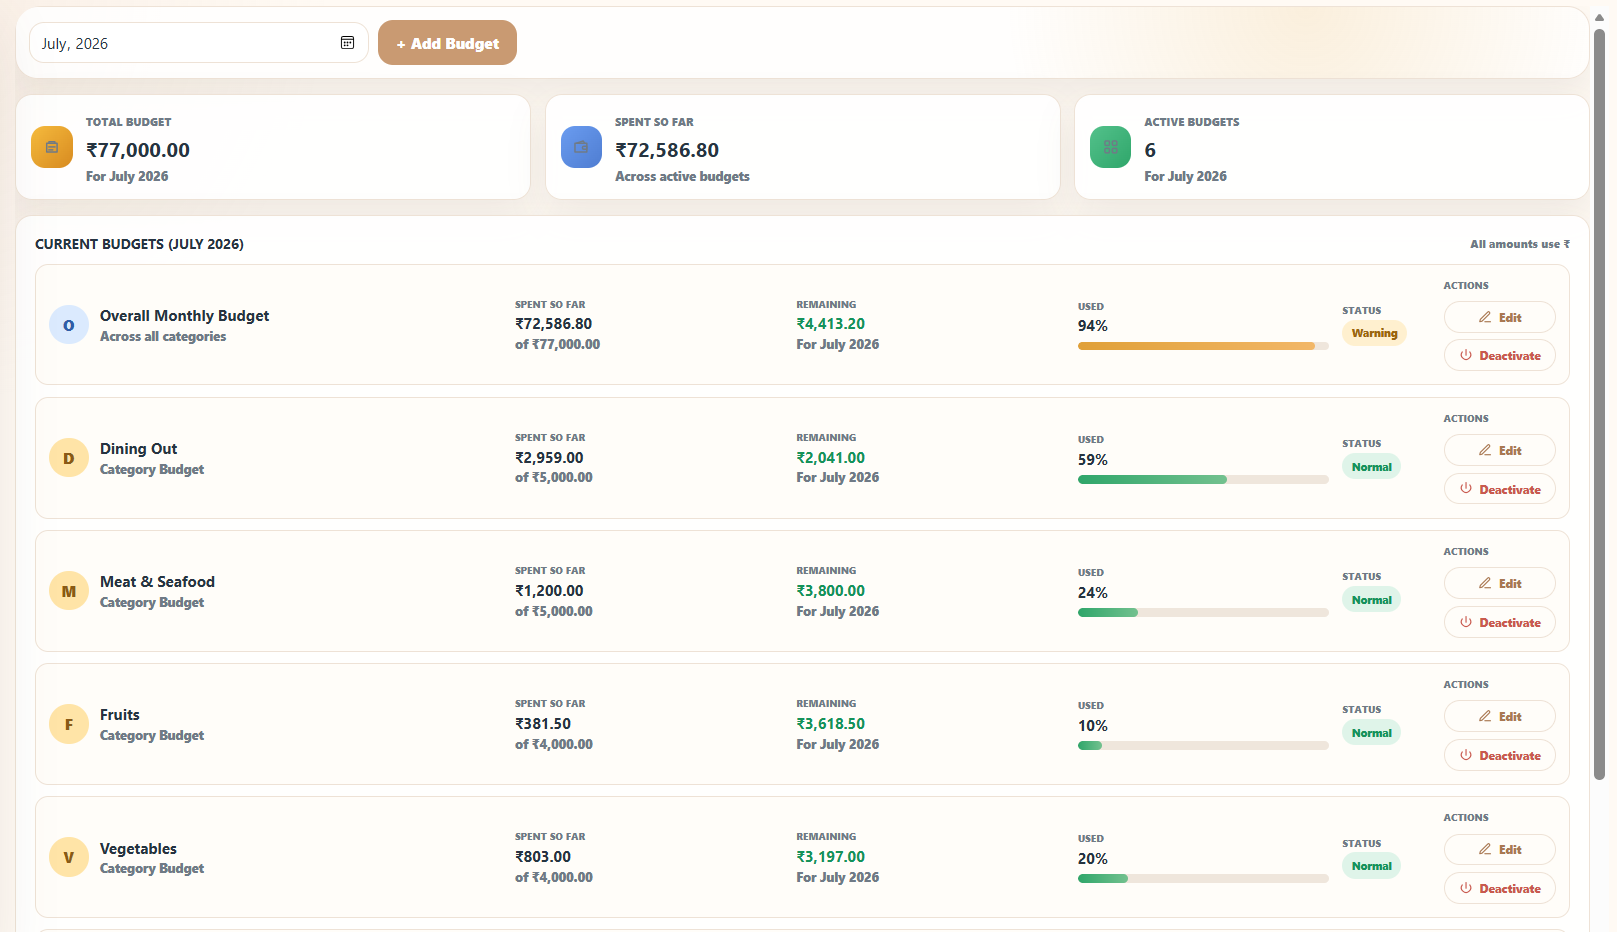
The same expense updates active budget progress and clearly separates excluded spending.
BUDGET PROGRESSUse the real Add Expense screen as the product proof, not a decorative illustration.
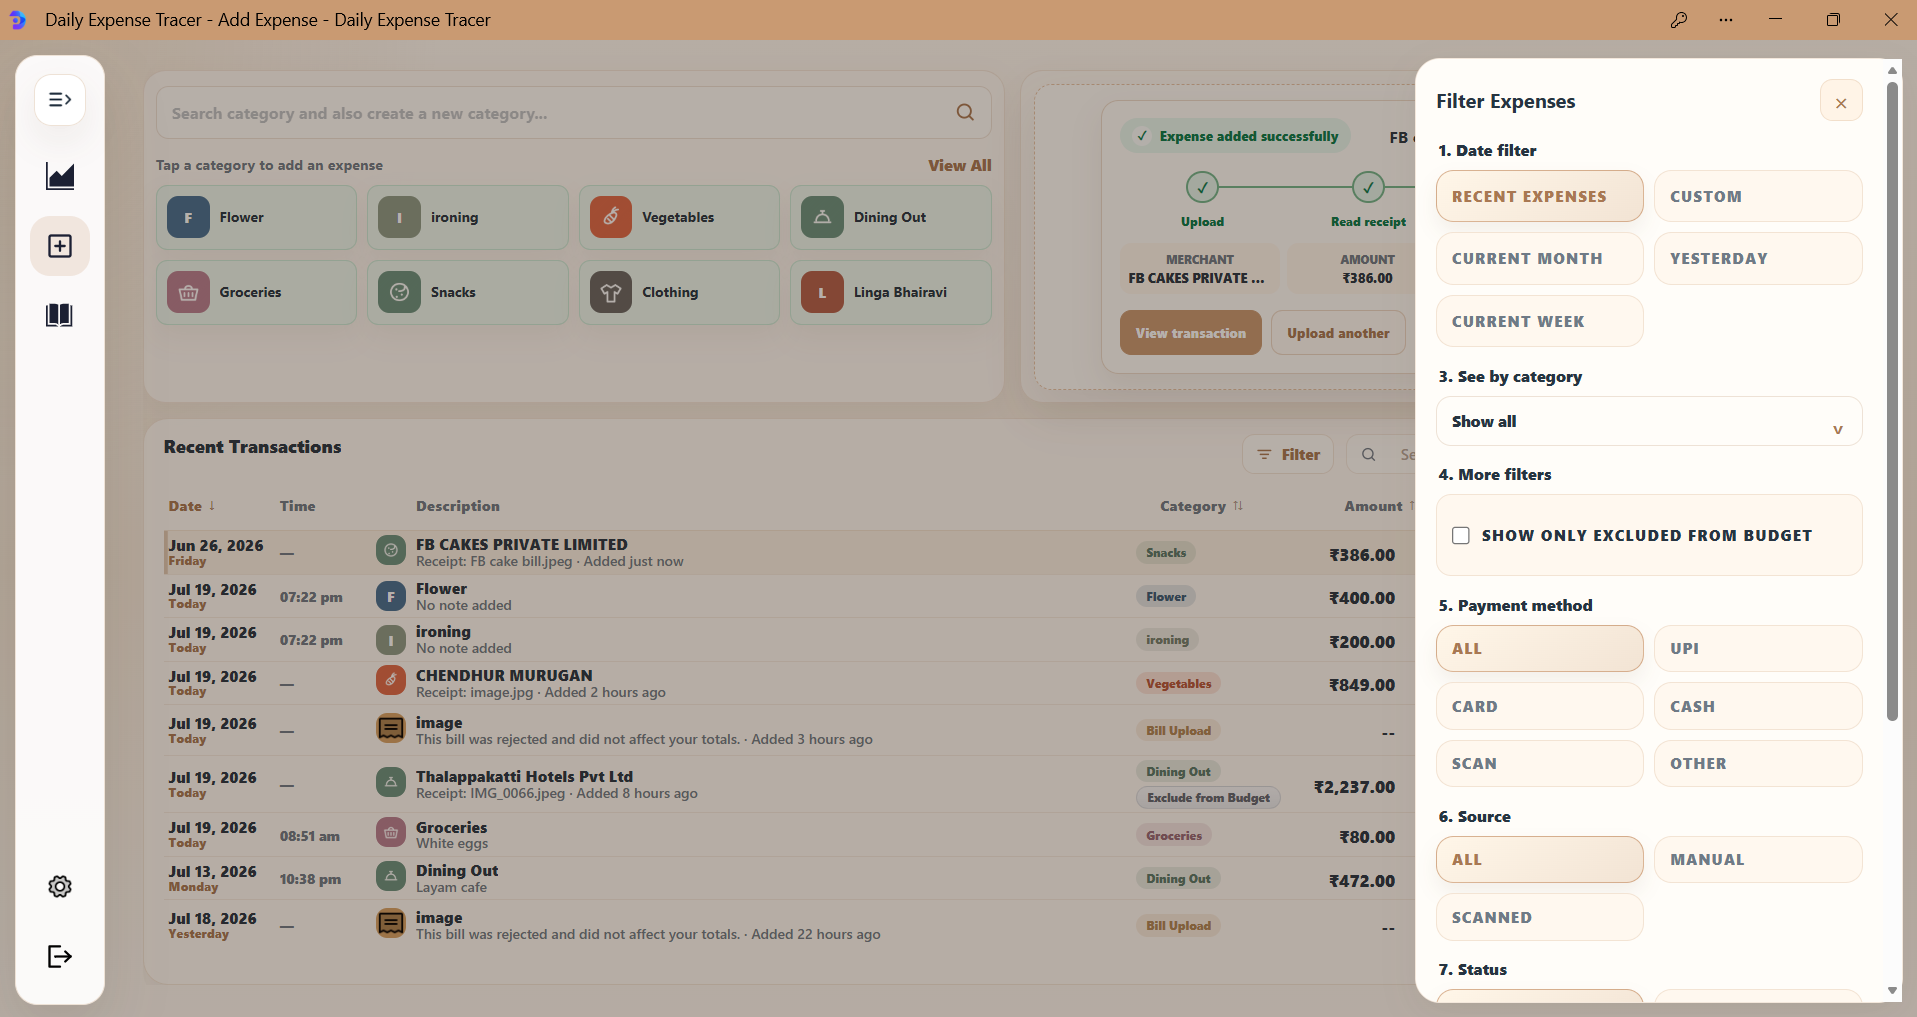
After capture and review, DET turns the same expense into useful context.
EXPENSE TOOLS
Each capability below uses a current DET screen and describes the workflow without adding unsupported automation.
Find and manage
Use search, filters, and sorting to narrow transaction records without changing the saved information.
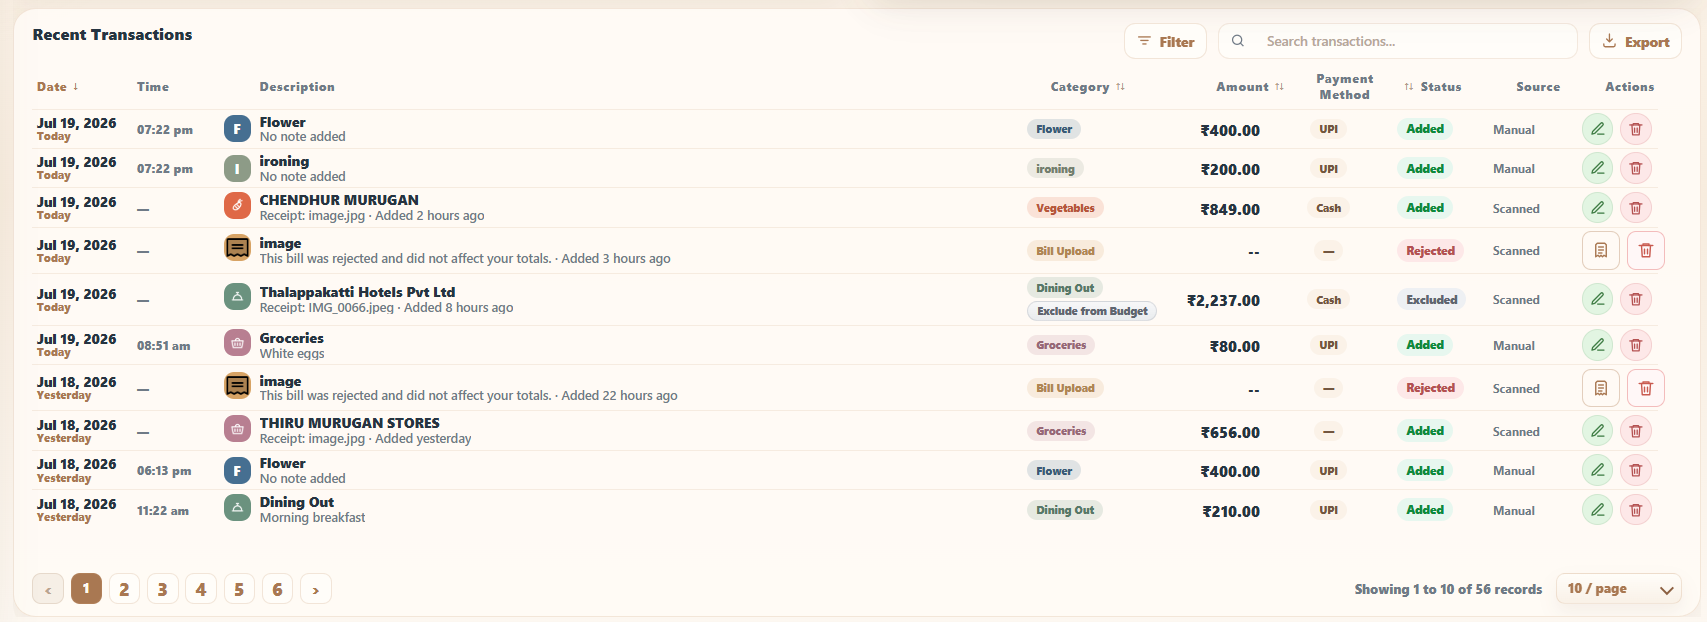
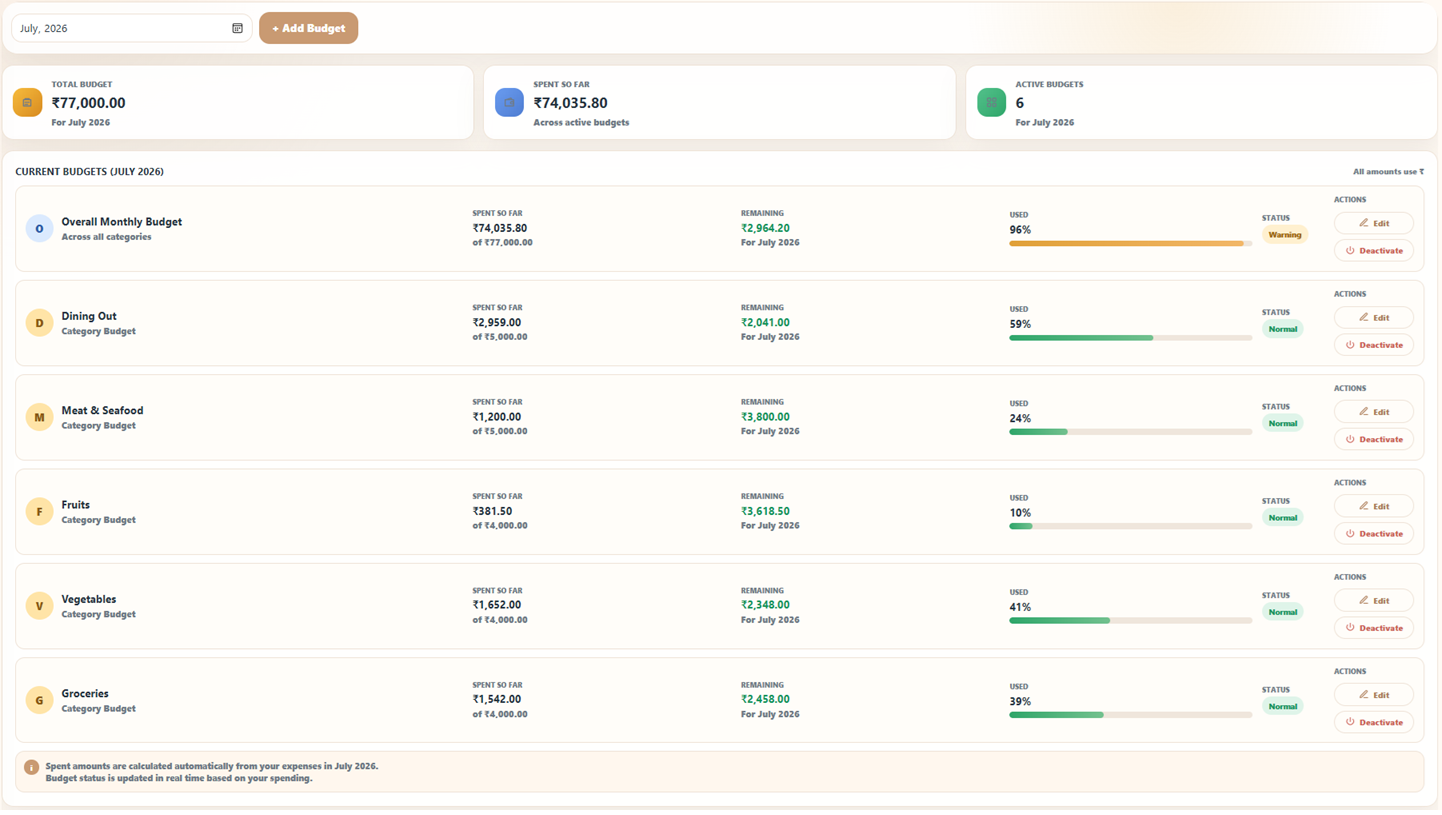
Budget and understand
Set overall or category budgets and compare included spending with the amount planned for the month.
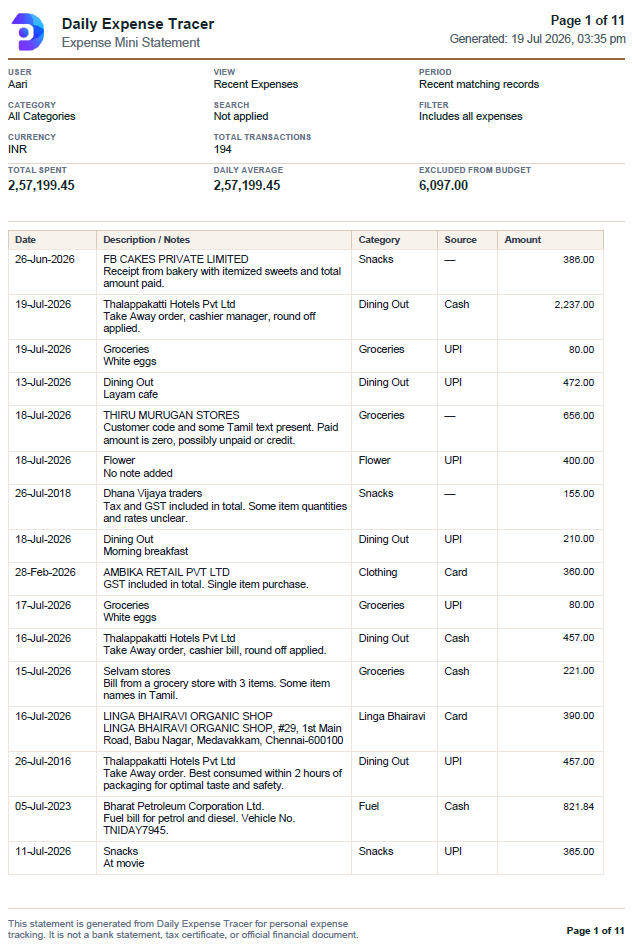
Export
Export the currently matching transaction records as a supported PDF after applying the period, search, and filters you need.
Category setup
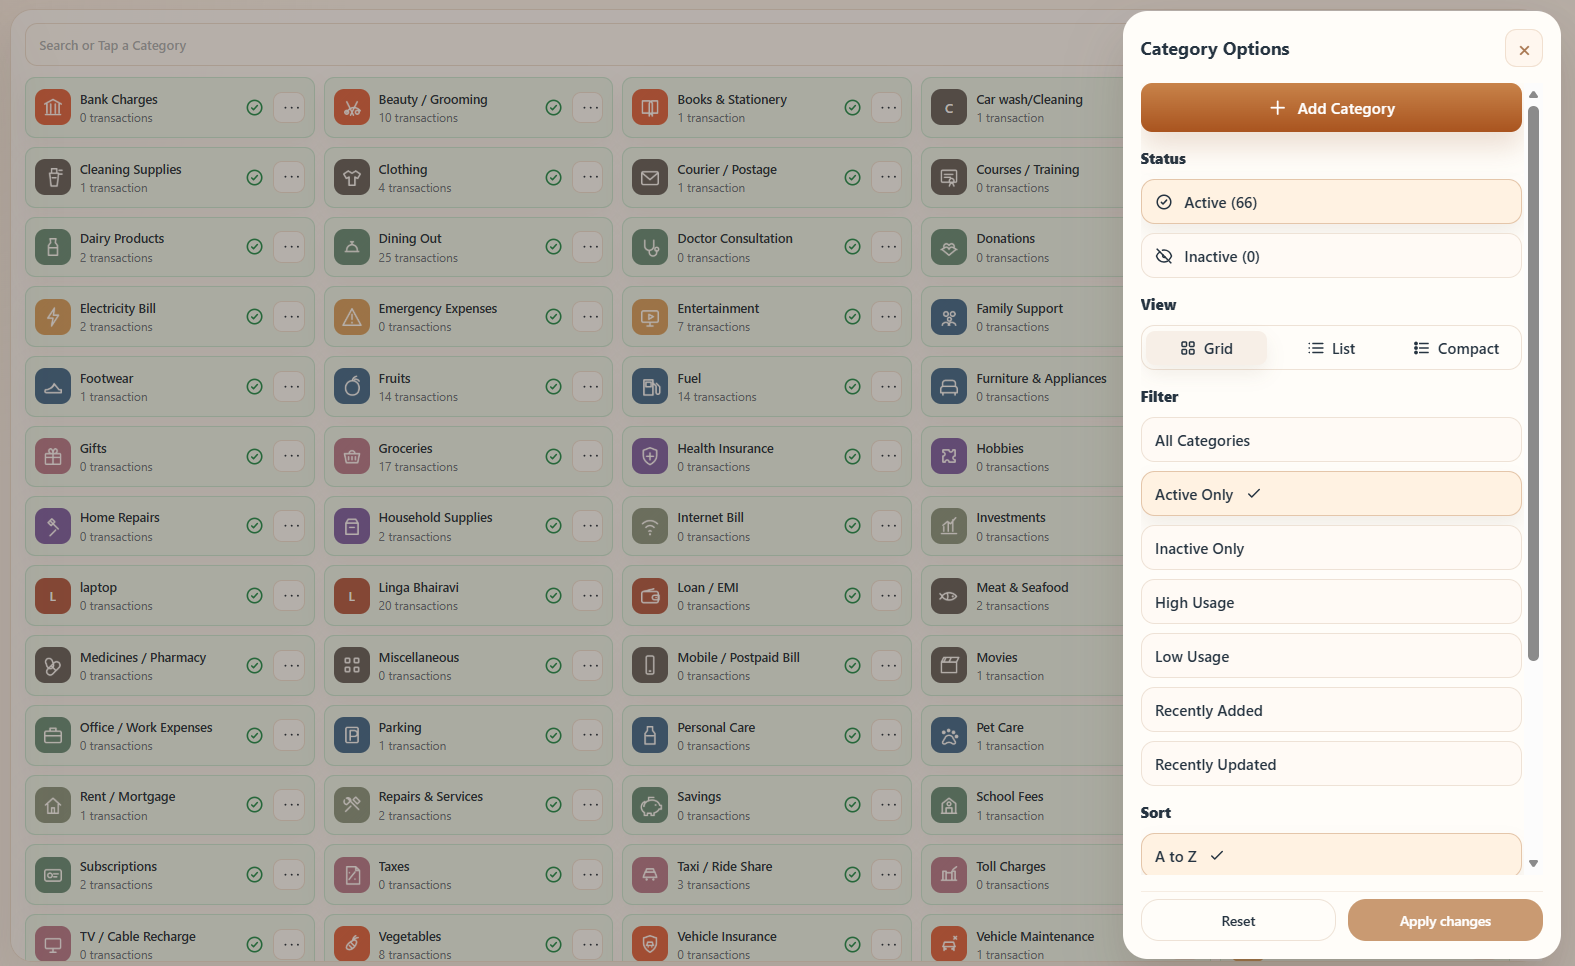
Create or organize categories from the searchable category flow, then use the available status, view, filter, and sorting options.
Installable PWA
Keep Daily Expense Tracer close at hand on supported phones, tablets, and computers.
Open DET from your home screen on supported phones and use compatible receipt sharing where available.
Use DET with more screen space and launch it directly from your supported device.
Launch DET from the desktop without installing it from an app store.
Practical by design
DET is built around the records you add, the settings you control, and practical tools you can use without ads.
Manage expense records and account settings after signing in.
Read the Privacy PolicyRecord expenses without connecting a bank or UPI account.
About Daily Expense TracerUse the current expense, budget, receipt, and reporting tools without advertising on the page.
See current updatesDaily Expense Tracer is independently maintained with a practical focus on useful, free expense-recording tools.
Contact the contributorDET guides provide general expense-recording and budgeting education, not financial advice.
FAQ
Practical answers about receipts, transaction records, categories, account access, budgets, and exports.
DET provides several ways to add an expense. On mobile, use Upload from Gallery or Take a Photo under Scan, or choose Quick Add under Manual Entry. On wider screens, use the Quick or Scan tab.
Use See All Categories on mobile or View All on wider screens to open Categories. Enter or confirm the amount, category, date, payment method, budget preference, and optional notes before saving.
After completing a payment, open its receipt and select Share or Share receipt, then choose Daily Expense Tracer. Direct sharing requires the installed app and a compatible device, browser, and payment app.
If DET is unavailable in the share menu, save the receipt image and use Upload from Gallery. See how to track UPI and online payment receipts.
On a supported desktop or laptop, drag a receipt onto the upload area. Supported iPhone and iPad apps may also allow drag and drop; availability varies by browser and device.
If drag and drop is unavailable, use Upload from Gallery, Take a Photo, or file selection. Organize bills and receipts digitally.
DET shows Upload → Read receipt → Check details → Result. If the required information is clear, DET can add the expense automatically. If a required value needs confirmation, the receipt remains Pending and DET asks you to review it.
You can continue using the page while processing continues. The transaction status updates when processing finishes.
DET compares an uploaded receipt with existing receipts and expenses and shows a possible-duplicate warning when details appear similar. Review the amount, date, merchant, and receipt preview before choosing Reject duplicate, View existing, Review details, or Add anyway.
When DET needs confirmation, choose Review, Review now, or Enter details. Compare the receipt image with the amount, category, merchant, date, payment method, budget preference, and notes before saving.
Use View receipt to open the stored image where available. See how receipt scanning and review work.
Yes. During receipt review, Save bill items as separate expenses controls whether DET saves the whole bill as one expense or saves each detected item separately.
Use the transaction filters to show a particular status.
Choose the available Edit or Review action to correct the amount, category, date, payment method, budget preference, or notes.
Deleting an expense removes it from normal transaction views and active totals, budgets, dashboard calculations, charts, and exports. Receipt actions vary with the upload’s current status.
Open transaction filters to narrow records by date or period, category, budget inclusion, payment method, source, status, or amount. Filters can be combined and cleared when you need the full list. Learn how to find expenses with search and filters.
Select a sortable Date, Category, Amount, or Payment Method heading to switch between ascending and descending order. Sorting changes only the displayed order and does not modify saved data.
Enter a keyword to match category, description, notes, payment method, or source. Search works with active filters; clear the text to return to the complete filtered list.
Enter a name in the searchable category field. If there is no match, select Create new category: [name]. You can also open See All Categories or View All to manage the list. Learn how to organize useful expense categories.
Open See All Categories or View All, enter a name in Search or Tap a Category, and use Filter for the available view, status, and sorting options. Clear the controls to restore the full list.
Enter a supported 10-digit Indian mobile number and select Send OTP. Enter the six-digit code and choose Verify OTP. A new user account is created automatically after successful verification.
If it does not arrive, wait for the 90-second timer before selecting Resend OTP. Never share your OTP with anyone.
Open Login or Create Account and continue with Mobile OTP or Google. New users create an account automatically after verification, while existing users continue with their linked mobile number or Google identity.
Open Profile to update your name or profile photo. Open Settings and choose Change Password to update your password. Changing the registered email address is not currently available.
Yes. DET works in supported mobile and desktop browsers and can be installed as a Progressive Web App on supported devices.
Open Budget to set an Overall Monthly Budget or a Category Budget. Included saved expenses update spent and remaining amounts automatically. Compare overall and category budgets.
The Dashboard shows totals, monthly budget health, top categories, trends, insights, comparisons, and quick actions for the selected period. Use the period control to update the cards and charts. Learn how to review monthly spending.
Open the transaction records on the Add Expense page, apply the required period, search, and filters, then select Export. DET downloads a PDF containing supported fields for the matching records.
Excluded expenses are identified in the report; use the budget-inclusion filter when needed. Learn how to export expense records as a PDF.
Ready when you are
Upload a receipt, review the details, and keep your spending organised.
Free to use. No ads. Installable on supported devices.